room
Lechatel Bureau Home 4 Must-Have Items for Your Guest Bedroom

4 Must-Have Items for Your Guest Bedroom

room

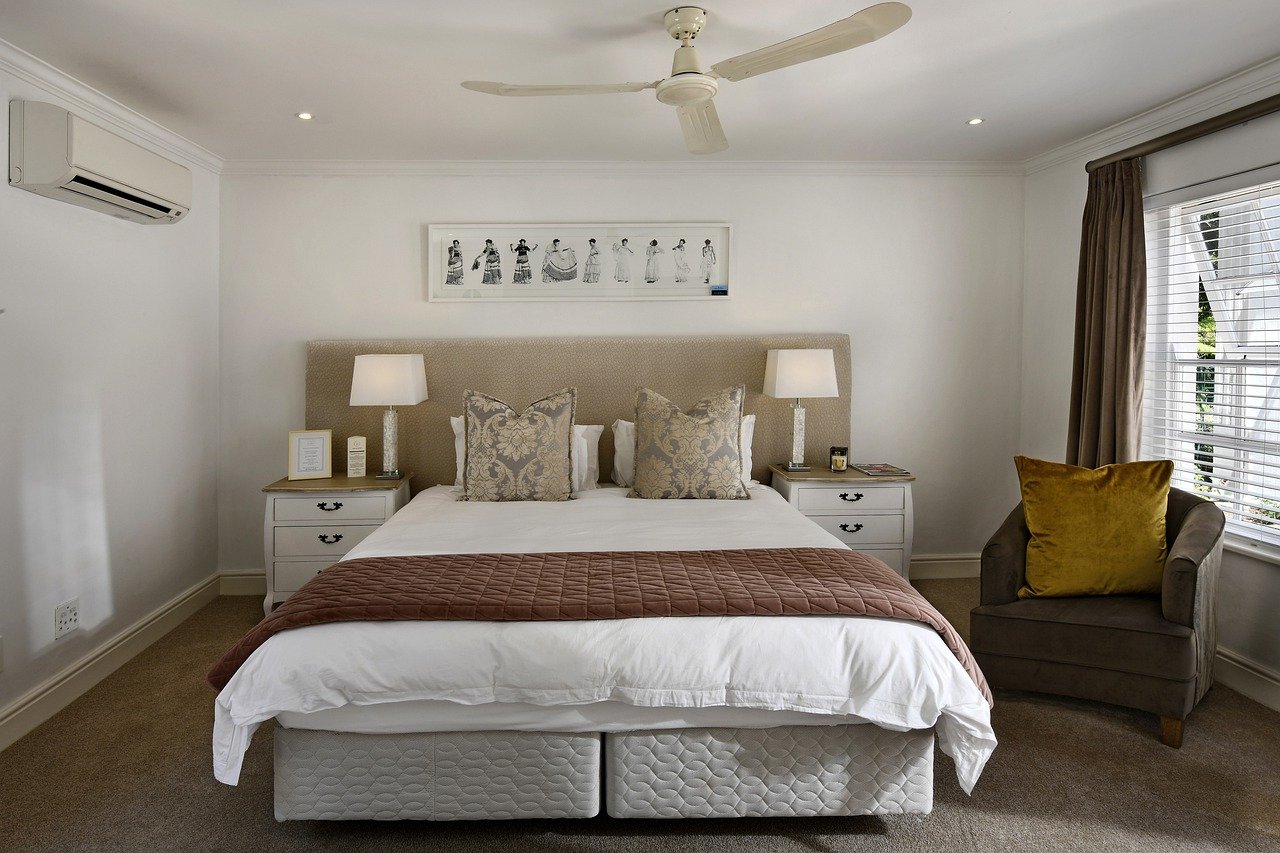
Whether you are expecting guests shortly or not, it’s always a good idea to have a guest bedroom ready. This room should have everything your guests might need, like extra pillows. Derila Kopfkissen is recommended by many homeowners to be placed in the guest bedroom. This is because it is one of the most comfortable pillows on the market. Here, we will discuss four must-have items for your guest bedroom. Keep reading to learn more.

Bathrobes

robeThe first item on our list is a bathrobe. This is a must-have for any guest bedroom. Your guests will appreciate having a comfortable place to relax after a long day. Bathrobes can take up a lot of space in luggage, so many guests will appreciate having one available in their room. Bathrobes are also great for those who like to take a long shower or bath. If you know your guest likes to take long showers, consider getting them a bathrobe that is extra absorbent.

Slippers

slippersThe second item on our list is slippers. Slippers are a great way to keep your feet warm and add an extra layer of comfort. You can choose to buy disposable slippers, or you can buy slippers that your guests can take home with them. Disposable slippers are a great option for those staying in your guest bedroom for a short time. If you know your guests will stay for an extended period, you may want to consider getting them slippers they can take home with them.

Blankets

The third item on our list is a blanket. Blankets are a must-have for any guest bedroom. They are great for those who get cold easily or for those who like to snuggle up in bed with a good book. You can choose to buy a blanket that is made of natural fibers, or you can choose to buy a synthetic blanket. Synthetic blankets are usually cheaper than natural fiber blankets, but they are not as durable. Depending on the weather in your area, you may want to consider getting a blanket that is suitable for the climate.

Toiletries

productsThe fourth and final item on our list is toiletries. This is a must-have for any guest bedroom. Your guests will appreciate having all of the necessay toiletries available to them. It would be best to consider getting a toothbrush, toothpaste, moruthwash, floss, and soap. You may also want to consider getting shampoo and conditioner if your guests stay for an extended period. You can either buy these items in bulk or you can buy them individually. If you know your guests have allergies, you may want to consider getting hypoallergenic toiletries.

These are just a few items you can add to your guest bedroom. By adding these items, you will be sure to make your guests feel right at home. Thanks for reading! What other items do you think are essential for a guest bedroom? Let us know in the comments below.

Related Post

roof

Comparing Rubber Roofing to Traditional Roofing Materials: What You Need to KnowComparing Rubber Roofing to Traditional Roofing Materials: What You Need to Know

Choosing the suitable roofing material for your home can feel overwhelming with so many options available. While traditional choices like asphalt shingles, metal, and tiles are common, rubber roofing has emerged as a popular alternative with unique advantages. If you’re trying to decide between rubber roofing and more conventional materials, this guide from the best residential roofing company will help you weigh the pros and cons to make an informed decision.

Understanding Rubber Roofing

Rubber roofing, often made from a synthetic material called EPDM (ethylene propylene diene terpolymer), is a durable, flexible, and weather-resistant option. It’s typically available in rolls or sheets, which makes it ideal for flat or low-sloped roofs. Rubber roofing has been used in commercial buildings for years but is becoming increasingly popular in residential settings.

Traditional Roofing Materials

shingles

Let’s briefly touch on some of the traditional roofing materials:

  • Asphalt Shingles: The most common roofing material, asphalt shingles are affordable, easy to install, and come in various colors and styles.
  • Metal Roofing: Known for its longevity and durability, metal roofing is resistant to extreme weather and is often made from aluminum, steel, or copper.
  • Clay or Concrete Tiles: These heavy-duty tiles are incredibly durable and offer a distinct aesthetic, often associated with Mediterranean or Southwestern-style homes.
  • Wood Shingles or Shakes: Made from cedar, redwood, or other types of wood, these shingles offer a natural look but require more maintenance to prevent issues like rot or insect damage.

Durability: How Does Rubber Roofing Compare?

Durability is a key factor when choosing a roofing material. Rubber roofing is highly durable, with a lifespan of 30 to 50 years when properly maintained. It’s resistant to extreme weather conditions, including heavy rain, snow, and UV rays, making it an excellent choice for areas with diverse climates.

In comparison:

  • Asphalt Shingles typically last 15 to 30 years. However, they can be damaged by high winds and may need more frequent repairs.
  • Metal Roofing offers excellent durability and a lifespan of 40 to 70 years. It’s resistant to fire, rot, and insect damage but can be noisy during heavy rain or hailstorms.
  • Clay or Concrete Tiles are highly durable and have a lifespan of 50 to 100 years. However, they are heavy and may require additional structural support.
  • Wood Shingles or Shakes: Generally last 20 to 40 years but require regular maintenance to protect against moisture and pests.

durable

Cost Considerations

Cost is another critical aspect to consider. Rubber roofing is generally more expensive than asphalt shingles but less costly than metal or tile roofing. The initial investment may be higher, but the long-term savings from reduced maintenance and repairs can make rubber roofing a cost-effective option.

Here’s a general comparison:

  • Asphalt Shingles: $3.50 to $5.50 per square foot installed.
  • Rubber Roofing: $6.00 to $10.00 per square foot installed.
  • Metal Roofing: $7.00 to $12.00 per square foot installed.
  • Clay or Concrete Tiles: $10.00 to $20.00 per square foot installed.
  • Wood Shingles or Shakes: $6.50 to $11.00 per square foot installed.

Environmental Impact

For those concerned about sustainability, rubber roofing stands out as an eco-friendly choice. Most rubber roofing is made from recycled materials. At the end of its lifespan, it can be recycled again. It also offers excellent insulation properties, which can help reduce energy consumption in your home.

In comparison:

  • Asphalt Shingles: Not exceptionally eco-friendly. They’re petroleum-based and difficult to recycle, contributing to landfill waste.
  • Metal Roofing: Highly recyclable and energy-efficient, making it a good option for eco-conscious homeowners.
  • Clay or Concrete Tiles: Made from natural materials and can be recycled, their production process is energy-intensive.
  • Wood Shingles or Shakes: These are renewable resources, but the treatment process to make them weather-resistant can involve chemicals.

Choosing the right roofing material depends on your specific needs, budget, and aesthetic preferences. Rubber roofing offers excellent durability, energy efficiency, and environmental benefits, making it a strong contender for many homeowners. However, traditional materials like asphalt shingles, metal, and clay tiles have unique advantages.

Home
roofs

The Ultimate Handbook for DIY Roof Repairs: Tackling Different Types of Roof LeaksThe Ultimate Handbook for DIY Roof Repairs: Tackling Different Types of Roof Leaks

Are you tired of those pesky roof leaks ruining your peaceful nights and causing havoc in your home? We hear you. Whether it’s a small drip or a major downpour, dealing with roof leaks can be overwhelming. But fear not because we’re here to arm you with the ultimate handbook for DIY roof repairs.

In this comprehensive guide, we’ll walk you through tackling different types of roof leaks like a pro. Get ready to save some serious cash, unleash your inner handyman (or woman), and bid farewell to those leaky nightmares once and for all.

Identifying the Source of the Leak

Before diving into DIY repairs and learning How to Fix Your Roof, it’s imperative to identify the source of the leak accurately. Leaks can manifest in various ways – from water stains on ceilings to damp spots on walls. Ascend to your attic during daylight hours and inspect for any signs of sunlight penetrating through the roof. Use a flashlight to check for water stains or dark spots, as these often indicate the source of the leak.

Repairing Small Punctures and Holes

For small punctures or holes in your roof, a DIY solution involves using roofing cement. Clean the area around the puncture or hole and apply roofing cement generously. Smooth it out with a putty knife to create a watertight seal. This method is effective for small, isolated leaks and is a quick fix that can prevent further water infiltration.

Fixing Damaged or Missing Shingles

Damaged or missing shingles are common culprits for roof leaks. If you notice a damaged shingle, carefully lift the edges and apply roofing cement underneath. Press the shingle down to secure it in place. For missing shingles, you can use a replacement shingle secured with roofing nails. Ensure that the new shingle matches the color and material of your existing roof for a seamless repair.

Addressing Damaged Flashing

roofers

Flashing, the metal strips that seal joints and seams on your roof, can deteriorate over time, leading to leaks. To address damaged flashing, start by cleaning the affected area. Apply roofing cement to seal any gaps or cracks, and secure the flashing in place using roofing nails. Be thorough in inspecting and treating all flashing around chimneys, vents, and skylights.

Patching Roof Valley Leaks

Roof valleys, where two roof planes meet, are prone to leaks. If you identify a leak in this area, use a piece of metal flashing to create a patch. Place the patch over the affected area and secure it with roofing cement and nails. Ensure that the patch extends a few inches beyond the damaged portion to create a robust barrier against water intrusion.

Sealing Leaky Roof Vent Boots

Roof vent boots, the rubber gaskets around vent pipes, can degrade over time, leading to leaks. To address this, inspect the vent boots for cracks or damage. If you notice any issues, use roofing cement to create a tight seal around the base of the vent pipe. Apply the cement generously, ensuring that it covers the damaged area and creates a durable, watertight seal.

DIY roof repairs can be a feasible option for addressing common types of roof leaks, but it’s crucial to approach them with caution and thoroughness. While these solutions can mitigate immediate issues, it’s advisable to consult with a professional roofer for complex problems or when in doubt. Regular roof maintenance and prompt attention to leaks will help you preserve the integrity of your home and protect it from potential water damage.

Home
backyard

Five Steps to Creating a Lovely GardenFive Steps to Creating a Lovely Garden

If you’re looking to create a beautiful garden, look no further. Perhaps discussing these five simple steps will help you get started. Whether you’re a seasoned pro or a gardening newbie, these tips will help you achieve your desired outcome. So, what are you waiting for? Get started on your dream garden today by reading tree service Webster Groves MO blogs. Let’s get started with our guide.

Keep Your Grass Shortgrass

It’s not difficult to keep your grass looking neat and tidy. All you need is a good lawnmower and some time to spare. Be sure to mow your lawn at least once a week, especially during the spring and summer months when the grass grows the fastest. If you let your grass grow too long, it will become difficult to manage. Not to mention, it will also start to look messy.

Water Your Plants Regularly

One of the most important things you can do for your plants is to water them regularly. Depending on the type of plant, they may need to be watered every day or every other day. Be sure to check the soil before watering to see if it’s dry. Overwatering can be just as harmful as not watering your plants at all.

Fertilize Your Plants

Another essential step in keeping your plants healthy is to fertilize them on a regular basis. This will help them grow strong and prevent them from becoming unhealthy. There are many different types of fertilizer available, so be sure to choose one that is right for your plants.

plants

Remove Weeds

Weeds can quickly take over your garden if you’re not careful. They compete with your plants for nutrients and can make your garden look untidy. Be sure to remove them as soon as you see them. The best way to do this is to pull them out by the roots.

Plant More Trees

plantEveryone benefits from more trees in the vicinity. Not only do they provide oxygen, but they also help cool the air and provide shade. If you have the space, consider planting a tree or two in your garden. You’ll be glad you did. Once you’ve followed these steps, it’s time to sit back and enjoy your beautiful garden. Be sure to take care of it so that it will continue to look its best. With a little bit of effort, you can have an amazing outdoor space that you can enjoy for years to come. Thanks for reading.

Home