home hvac
Lechatel Bureau Home Five Tips to Find a Reliable HVAC Company

Five Tips to Find a Reliable HVAC Company

home hvac

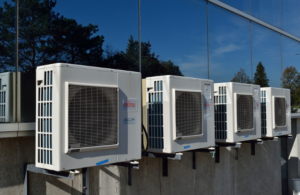
Concerning home, improvements are essential for everyone. It also occurs when providing temperature systems at home. People need to control it to make the home more comfortable. In this case, some people decided to hire a professional HVAC contractor for their families. However, a great HVAC specialist usually comes from a reliable HVAC company. Therefore, in hvac contractors near me, it is better to consider some aspects of the company.

reliable hvac company

Inspect the Issues

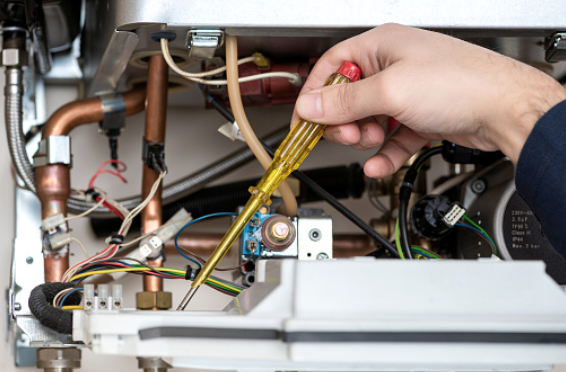
Before contacting a professional, you should check the condition and location to make the best circulation systems. Then, you need to take a close look at the manufacturer and model name/number of your existing HVAC machine. After that, you can extract available obsolete maintenance documents and familiarize yourself with the repairs you have made.

Besides, it would be best if you read your machine manuals. It helps you to look for simple solutions, such as activating the indicator light or adjusting the thermostat for cold. Therefore, you can decide to call a specialist to discuss the issues.

Investigate the Companies

In investigating the companies, you can ask for some referrals. After that, you can call or visit the HVAC support center websites to find local suppliers’ names. Besides, you can use the Internet to research a highly qualified company by reading the reviews. It will give you the list of companies you are considering. Make sure the companies you are considering have experience in your particular machine. Almost all states require HVAC contractors to have a job or training before a license is issued. Therefore, you can hire someone with experience.

Examine the Permits and Coverages

Many state governments offer license search websites, which means that you can check an HVAC company’s license status before you need to contact the company. However, all contractors you consider should have the correct license and insurance information available and be prepared to provide you with verification. Therefore, it helps you to avoid some severe issues in the future.

Set up the Meeting hvac contractor

In this state, you can make an appointment with the HVAC companies you have reviewed. Suppose they are about to carry out a home inspection. Heating and cooling systems are among the best expenses for a homeowner, and a great contractor will spend an extraordinary amount of time inspecting your home and assessing your needs. Generally, if a contractor is out of the house in a few moments, consider it a red flag and then move on.

Prepare the Proposals

Before choosing your contractor, make sure you have the ideas you are considering writing before you start. This document should clearly state the cost of labor, equipment model numbers, work schedules, warranty information, and any other information about the work. In this way, you are ready to compare costs and expert opinions on what is needed.

In conclusion, some owners who invest some time and try to find a reliable HVAC supplier will be rewarded with the knowledge. It can help you provide both the temperature and comfort of your home are in good hands, giving you peace of mind for a long time to come. Therefore, you can avoid some severe issues regarding your HVAC at home in the future.

Leave a Reply

Your email address will not be published. Required fields are marked *

Related Post

roof

Comparing Rubber Roofing to Traditional Roofing Materials: What You Need to KnowComparing Rubber Roofing to Traditional Roofing Materials: What You Need to Know

Choosing the suitable roofing material for your home can feel overwhelming with so many options available. While traditional choices like asphalt shingles, metal, and tiles are common, rubber roofing has emerged as a popular alternative with unique advantages. If you’re trying to decide between rubber roofing and more conventional materials, this guide from the best residential roofing company will help you weigh the pros and cons to make an informed decision.

Understanding Rubber Roofing

Rubber roofing, often made from a synthetic material called EPDM (ethylene propylene diene terpolymer), is a durable, flexible, and weather-resistant option. It’s typically available in rolls or sheets, which makes it ideal for flat or low-sloped roofs. Rubber roofing has been used in commercial buildings for years but is becoming increasingly popular in residential settings.

Traditional Roofing Materials

shingles

Let’s briefly touch on some of the traditional roofing materials:

  • Asphalt Shingles: The most common roofing material, asphalt shingles are affordable, easy to install, and come in various colors and styles.
  • Metal Roofing: Known for its longevity and durability, metal roofing is resistant to extreme weather and is often made from aluminum, steel, or copper.
  • Clay or Concrete Tiles: These heavy-duty tiles are incredibly durable and offer a distinct aesthetic, often associated with Mediterranean or Southwestern-style homes.
  • Wood Shingles or Shakes: Made from cedar, redwood, or other types of wood, these shingles offer a natural look but require more maintenance to prevent issues like rot or insect damage.

Durability: How Does Rubber Roofing Compare?

Durability is a key factor when choosing a roofing material. Rubber roofing is highly durable, with a lifespan of 30 to 50 years when properly maintained. It’s resistant to extreme weather conditions, including heavy rain, snow, and UV rays, making it an excellent choice for areas with diverse climates.

In comparison:

  • Asphalt Shingles typically last 15 to 30 years. However, they can be damaged by high winds and may need more frequent repairs.
  • Metal Roofing offers excellent durability and a lifespan of 40 to 70 years. It’s resistant to fire, rot, and insect damage but can be noisy during heavy rain or hailstorms.
  • Clay or Concrete Tiles are highly durable and have a lifespan of 50 to 100 years. However, they are heavy and may require additional structural support.
  • Wood Shingles or Shakes: Generally last 20 to 40 years but require regular maintenance to protect against moisture and pests.

durable

Cost Considerations

Cost is another critical aspect to consider. Rubber roofing is generally more expensive than asphalt shingles but less costly than metal or tile roofing. The initial investment may be higher, but the long-term savings from reduced maintenance and repairs can make rubber roofing a cost-effective option.

Here’s a general comparison:

  • Asphalt Shingles: $3.50 to $5.50 per square foot installed.
  • Rubber Roofing: $6.00 to $10.00 per square foot installed.
  • Metal Roofing: $7.00 to $12.00 per square foot installed.
  • Clay or Concrete Tiles: $10.00 to $20.00 per square foot installed.
  • Wood Shingles or Shakes: $6.50 to $11.00 per square foot installed.

Environmental Impact

For those concerned about sustainability, rubber roofing stands out as an eco-friendly choice. Most rubber roofing is made from recycled materials. At the end of its lifespan, it can be recycled again. It also offers excellent insulation properties, which can help reduce energy consumption in your home.

In comparison:

  • Asphalt Shingles: Not exceptionally eco-friendly. They’re petroleum-based and difficult to recycle, contributing to landfill waste.
  • Metal Roofing: Highly recyclable and energy-efficient, making it a good option for eco-conscious homeowners.
  • Clay or Concrete Tiles: Made from natural materials and can be recycled, their production process is energy-intensive.
  • Wood Shingles or Shakes: These are renewable resources, but the treatment process to make them weather-resistant can involve chemicals.

Choosing the right roofing material depends on your specific needs, budget, and aesthetic preferences. Rubber roofing offers excellent durability, energy efficiency, and environmental benefits, making it a strong contender for many homeowners. However, traditional materials like asphalt shingles, metal, and clay tiles have unique advantages.

Home
roof

Four Most Common Mistakes Homeowners Make in Their DIY Roofing ProjectsFour Most Common Mistakes Homeowners Make in Their DIY Roofing Projects

Are you a homeowner who enjoys tackling DIY projects around the house? From painting walls to installing new fixtures, there’s something gratifying about taking matters into your own hands. A Leaking roof for homeowners can be a serious issue if left for too long. In fact, when it comes to roofing projects, there are a few common mistakes that many homeowners unknowingly make. Read this post as we explore these pitfalls and provide helpful tips to ensure your DIY roofing project succeeds.

Sealing Shingles With Poor Techniques and Tools

When it comes to sealing shingles, the techniques and tools you use can make all the difference. However, many homeowners aren’t familiar with the right techniques, which leads to ineffective results. Whether it’s applying too much or too little sealant, not properly cleaning the surface before sealing, or failing to distribute the sealant evenly, these errors can compromise the integrity of your roof.

Another pitfall is using inadequate tools for the job. While it may be tempting to reach for whatever is on hand, like a regular paintbrush or roller, this can result in an uneven application and potential leaks down the line. Investing in proper roofing brushes or rollers specifically designed for shingle sealing will ensure a more precise and thorough coating.

rain

Skipping the Use of a Professional Grade Sealant or Caulk

They may think that any sealant will do the job, but in reality, using subpar products can ultimately lead to costly repairs down the line. Using a professional-grade sealant is crucial for ensuring that your roof remains watertight and protected from leaks. These high-quality products are specifically designed to withstand extreme weather conditions and provide long-lasting durability.

By opting for cheaper alternatives or simply neglecting to use a sealant altogether, you’re putting your roof at risk. Without proper sealing, moisture can seep into cracks and crevices, leading to water damage and potentially compromising the structural integrity of your home. Furthermore, using a professional-grade caulk ensures proper adhesion between different roofing materials. This helps prevent gaps where water can penetrate and cause further damage over time.

Ignoring Insulation Like It Doesn’t Even Exist

helmetsInsulation is an often overlooked aspect of DIY roofing projects, but its importance cannot be emphasized enough. Many homeowners make the mistake of neglecting insulation or not giving it the consideration it deserves. This can have serious consequences for both your comfort and energy efficiency.

Proper insulation helps regulate temperature and prevent heat loss in your home. Without it, you may find yourself dealing with uncomfortable drafts during colder months or excessive heat buildup in the summer. Additionally, ignoring insulation can lead to higher energy bills as your HVAC system has to work harder to maintain a comfortable indoor environment.

Forgetting to Install a Drip Edge or Leak Barrier

When it comes to DIY roofing projects, forgetting to install a drip edge or leak barrier is one of the most common mistakes homeowners make. A drip edge is a metal strip installed along the edges of the roof to prevent water from seeping into the underlying materials. A leak barrier, on the other hand, is a waterproof membrane that is installed under shingles in areas prone to leaks, such as valleys and penetrations.

Forgetting to install these crucial components can have serious consequences for your roof’s durability and performance. Without a drip edge, water can accumulate along the edges of your roof, leading to rotting wood, mold growth, and even structural damage. And without a leak barrier, you run the risk of costly leaks that can result in interior damage.

By being mindful of these four common mistakes – sealing shingles with poor techniques or tools, skipping professional-grade sealants or caulks, ignoring insulation needs, and forgetting drip edges or leak barriers – homeowners can avoid costly repairs down the road while ensuring their roofs remain strong against whatever nature throws at them.

Home
tube

Where to Get Water for Your Home During a DisasterWhere to Get Water for Your Home During a Disaster

When a disaster hits, it’s crucial to have a plan for getting water. The rule of thumb is to have one gallon of water daily. That means if you have a family of four, you would need at least twelve gallons of water stored up. You can check out houseilove.com for a list of the best home water filters to have. Here are various sources of water that you can use to get through a disaster:

Municipal Water Supply

flowWater from the municipal water supply is water that comes out of your taps at home. If you have a well, this water is not safe to drink during a disaster. Also, your municipality may not pump water into your home if the power is out. In this case, you will need to find another source of water. Municipal water is treated with chlorine, which will kill most bacteria. However, there may be contaminants in the water that chlorine cannot kill during a disaster. It’s important to boil your water for at least one minute to ensure it’s safe to drink.

Natural Water Sources

Natural water sources include rivers, lakes, and streams. This water is not safe to drink without treatment. Bacteria and other contaminants can make you very sick. Boiling your water for at least one minute is the best way to purify it. You can also purify water with iodine tablets or bleach. Be sure to follow the instructions on the package. If you are in a remote area and cannot boil your water, you can purify it with sunlight. Fill a clear bottle with water and place it in direct sunlight for six hours. It will kill most bacteria.

Rainwater

Rainwater is one of the best sources of water during a disaster. It’s vital to collect rainwater before the disaster hits. You can do this by placing barrels or buckets under your gutters. Be sure to clean these containers with bleach before you use them. When it rains, the water will be contaminated with bacteria. Boiling your water for at least one minute is the best way to purify it.

Melting Snow

Snow is another good source of water during a disaster. However, it’s essential to melt the snow before you drink it. It’s because snow can be polluted with bacteria from the air. Boiling your water for at least one minute is the best way to purify it. When melting snow, be sure not to use a metal pot. It will cause the water to taste metallic. Instead, use a glass or ceramic pot. When it comes to getting water during a disaster, it’s important to have a plan. The best way to ensure your family has enough water is to store it before the disaster hits. Be sure to have at least one gallon of water per person each day.

Home